HDR Photo Processing: Create Stunning High Dynamic Range Images

Table of Contents
- Understanding HDR Photography
- When to Use HDR Processing
- HDR vs Regular Photos: The Difference
- Exposure Compensation Explained
- White Point and Intensity Adjustments
- Avoiding HDR Over-Processing
- Step-by-Step HDR Processing Guide
- Best Practices and Professional Examples
- Common HDR Mistakes to Avoid
- FAQ

Understanding HDR Photography
High Dynamic Range (HDR) refers to the range of light between the darkest and brightest parts of an image. Human eyes can perceive a much wider dynamic range than cameras, which is why our photos often don't match what we saw.
What is Dynamic Range?
Dynamic range is the ratio between the brightest and darkest parts of an image that can be captured while retaining detail.
The Challenge:
- 👁️ Human Eye: ~20 stops of dynamic range
- 📷 Camera Sensor: ~8-14 stops (depending on camera)
- 🖼️ Standard Photo: ~6-8 stops displayed
This gap is why:
- Bright skies get "blown out" (pure white, no detail)
- Dark shadows become pure black (no detail)
- You can't capture both bright and dark areas perfectly
How HDR Processing Helps
HDR processing compresses the dynamic range of a scene to fit within what can be displayed, while preserving detail in both highlights and shadows.
The Magic:
- ✅ Recover highlight detail in bright skies
- ✅ Reveal shadow detail in dark areas
- ✅ Create more balanced, natural-looking images
- ✅ Capture the scene as your eyes saw it
Left: Regular Photo (lost sky detail) | Right: HDR Processed (preserved both sky and ground detail)

When to Use HDR Processing
HDR processing isn't for every photo. Here's when it works best and when to avoid it:
✅ Best Use Cases for HDR
1. Landscape Photography
Perfect for:
- Sunrise/sunset scenes with bright skies and dark foregrounds
- Mountain landscapes with deep valleys and bright peaks
- Seascapes with dramatic skies and darker water
Why it works: Landscapes often have extreme contrast between sky and ground
2. Real Estate & Interior Photography
Perfect for:
- Room interiors with bright windows
- Architectural shots with indoor/outdoor views
- Property exteriors with sky and shadow
Why it works: Balances indoor lighting with outdoor brightness
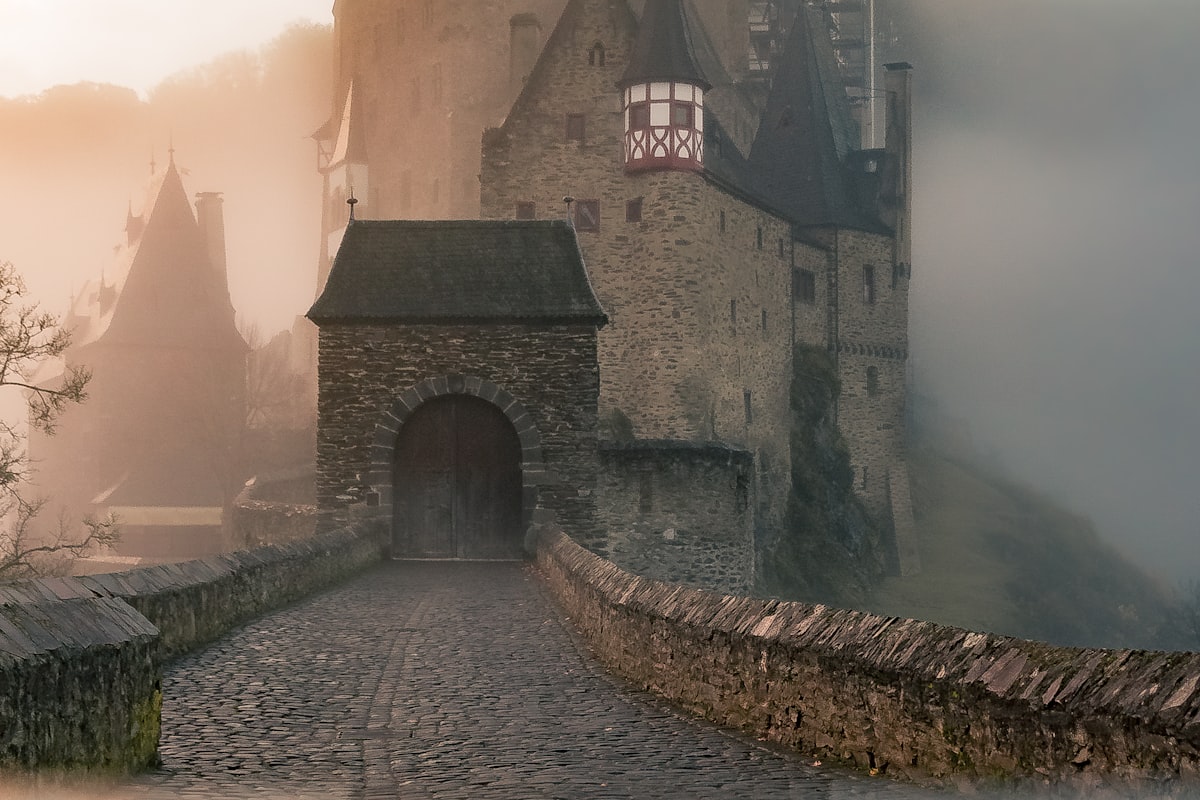
3. Architectural Photography
Perfect for:
- Buildings with strong shadows and bright highlights
- Urban scenes with dark alleys and bright sky
- Historic buildings with intricate details in shadows
Why it works: Reveals detail in both bright facades and shadowy architectural elements
4. High-Contrast Scenes
Perfect for:
- Backlit subjects
- Forest scenes with sun breaking through trees
- Any scene where you can't get proper exposure for both highlights and shadows
❌ When NOT to Use HDR
Avoid HDR for:
-
Portraits (especially close-ups)
- Reason: HDR can make skin look unnatural and overly textured
- Exception: Environmental portraits where background matters
-
Moving Subjects
- Reason: Motion blur in traditional multi-shot HDR
- Exception: Single-shot HDR processing can work
-
Low-Contrast Scenes
- Reason: No benefit, may look over-processed
- Example: Overcast day with even lighting
-
Already Well-Exposed Photos
- Reason: Won't improve the image, may degrade quality
-
Photos Needing Natural Look
- Reason: HDR can look artificial if not done carefully
- Note: Subtle HDR can work
HDR vs Regular Photos: The Difference
Understanding the difference helps you make better processing decisions:
| Aspect | Regular Photo | HDR Photo |
|---|---|---|
| Dynamic Range | Limited (8-14 stops) | Extended (16-24+ stops perceived) |
| Highlights | Often blown out | Detail preserved |
| Shadows | Often crushed | Detail revealed |
| Processing | Single exposure adjustment | Advanced tone mapping |
| Best For | Portraits, low-contrast scenes | High-contrast landscapes, architecture |
| Risk | Boring if poorly exposed | Unnatural if over-processed |
Visual Comparison
Before HDR (Regular Photo):
- ☀️ Sky: Bright white, no cloud detail
- 🏔️ Mountains: Good exposure
- 🌲 Foreground: Too dark, lost detail
After HDR (Processed):
- ☁️ Sky: Rich blue with visible clouds
- 🏔️ Mountains: Maintained good exposure
- 🌳 Foreground: Revealed detail, natural appearance
Exposure Compensation Explained
Exposure compensation is the foundation of HDR processing. It controls how much detail you recover from highlights and shadows.
How Exposure Compensation Works
Think of exposure compensation as revealing hidden information in your photo:
Positive Values (+):
- Brightens the entire image
- Reveals shadow detail
- Risk: Blowing out highlights further
Negative Values (-):
- Darkens the entire image
- Recovers highlight detail
- Risk: Crushing shadows further
HDR's Special Power: Unlike regular exposure adjustment, HDR processing applies different adjustments to different tonal ranges simultaneously.
The HDR Exposure Triangle
In our HDR tool, you control:
-
Exposure Compensation (-2 to +2 EV)
- Overall brightness adjustment
- Start here for major corrections
-
White Point (0 to 100)
- Controls how bright highlights get
- Lower values = more highlight detail retained
-
Intensity (0 to 100)
- Strength of HDR effect
- Higher values = more dramatic results
Practical Exposure Guidelines
| Scene Type | Exposure Comp | White Point | Intensity |
|---|---|---|---|
| Bright Sky/Dark Ground | +0.5 to +1.0 | 30-50 | 60-80 |
| Backlit Subject | +1.0 to +1.5 | 20-40 | 70-90 |
| Interior with Window | +0.3 to +0.7 | 40-60 | 50-70 |
| Sunset/Sunrise | +0.2 to +0.5 | 25-45 | 60-80 |
| Overcast Landscape | +0.0 to +0.3 | 50-70 | 40-60 |
White Point and Intensity Adjustments
These two controls fine-tune your HDR results:
White Point Adjustment
What it does: Defines what level of brightness should be considered "white"
Lower White Point (0-30):
- ✅ Preserves maximum highlight detail
- ✅ Best for bright skies, sunsets
- ⚠️ May make image look flat if too low
- 🎯 Use when: You need to recover blown highlights
Medium White Point (40-60):
- ✅ Balanced approach
- ✅ Natural-looking results
- ✅ Good starting point
- 🎯 Use when: Scene is moderately high-contrast
Higher White Point (70-100):
- ✅ Punchier, more contrasty look
- ✅ Brighter overall appearance
- ⚠️ May clip highlights
- 🎯 Use when: You want dramatic contrast
Same photo with White Point at 20, 50, and 80
Intensity Adjustment
What it does: Controls the strength of the HDR effect
Low Intensity (20-40):
- ✅ Subtle, natural enhancement
- ✅ Minimal risk of over-processing
- ✅ Good for portraits or natural scenes
- 🎯 Use when: You want subtle improvement
Medium Intensity (50-70):
- ✅ Noticeable but natural improvement
- ✅ Good balance of drama and realism
- ✅ Works for most landscapes
- 🎯 Use when: Typical landscape or architecture
High Intensity (80-100):
- ✅ Dramatic, artistic look
- ✅ Maximum detail enhancement
- ⚠️ Risk of halos and artifacts
- 🎯 Use when: You want stylized, impactful images
Pro Tip: Start with medium intensity (50-60) and adjust from there. It's easier to add more effect than to dial back an over-processed image.
Avoiding HDR Over-Processing
Over-processed HDR is one of the most common mistakes. Here's how to keep your images natural:
Signs of Over-Processed HDR
❌ Halos: Bright or dark glows around edges
❌ Unnatural Saturation: Overly vivid, cartoon-like colors
❌ Flat Look: Loss of depth and dimension
❌ Excessive Detail: "Crunchy" texture, especially in skies
❌ Gray Shadows: Shadows that should be black appear gray
Over-Processed HDR: Notice the halos around trees and overly saturated colors
The Natural HDR Approach
✅ Subtle Adjustments: Less is often more
✅ Preserve Blacks: Some areas should remain dark
✅ Realistic Colors: Enhance, don't transform
✅ Check Edges: Look for halo artifacts
✅ Maintain Depth: Keep sense of depth and dimension
Well-Processed HDR: Enhanced detail while maintaining natural appearance
The "Before/After" Test
Always compare before and after:
- Process your HDR image
- Toggle to original
- Ask yourself:
- Does it look like a real place?
- Are the colors believable?
- Is the improvement worth any artifacts?
- Would someone compliment it or question it?
Rule of Thumb: If someone asks "Is that HDR?", you probably went too far. The best HDR is invisible.
Step-by-Step HDR Processing Guide
Follow this professional workflow for stunning HDR results:
Step 1: Select the Right Photo
Choose a photo with:
- ✅ High contrast (bright and dark areas)
- ✅ Important detail in both highlights and shadows
- ✅ Static subject (no motion blur)
- ✅ Sharp focus
Avoid photos with:
- ❌ Even lighting (no benefit from HDR)
- ❌ Already well-exposed (both highlights and shadows good)
- ❌ Motion blur or moving subjects
- ❌ Poor focus or technical issues
Step 2: Upload to HDR Tool
- Go to Free HDR Processing Tool
- Upload your photo (drag-and-drop or click)
- Navigate to the Professional Tools section
- Select HDR Processing
Step 3: Initial Assessment
Evaluate your photo:
- Where are the highlights blown out?
- Where are the shadows too dark?
- What's the most important area to preserve?
- What mood do you want?
Typical scenarios:
- Landscape with bright sky: Focus on recovering sky detail
- Backlit subject: Focus on revealing foreground
- Interior with window: Balance indoor and outdoor
- Sunset: Enhance existing drama
Step 4: Adjust Exposure Compensation
- Start with +0.5 EV if shadows are too dark
- Start with -0.5 EV if highlights are too bright
- Adjust in 0.2-0.3 increments
- Watch the real-time preview
- Stop when overall brightness looks good
Checkpoint: The image should be well-exposed overall, but may still lack detail in extremes.
Step 5: Set White Point
- Start at 50 (middle value)
- Lower (30-40) if you need to preserve bright highlights
- Raise (60-70) if you want more punch and contrast
- Find the sweet spot where highlights have detail but image isn't flat
Checkpoint: Bright areas (sky, reflections) should have visible detail, not pure white.
Step 6: Adjust Intensity
- Start at 50-60 (moderate effect)
- Increase (70-80) for landscapes, architecture, dramatic scenes
- Decrease (30-40) for portraits, natural scenes
- Watch for halos and over-processing
Checkpoint: Shadows should reveal detail but still look natural, not gray.
Step 7: Fine-Tune and Verify
Final checks:
- ✅ Toggle before/after to compare
- ✅ Zoom in to check for halos around edges
- ✅ Verify colors still look natural
- ✅ Check that shadows aren't too gray
- ✅ Ensure highlights aren't too flat
Make micro-adjustments:
- Tweak intensity ±5 points
- Adjust white point ±5 points
- Fine-tune exposure ±0.1 EV
Step 8: Additional Enhancements (Optional)
After HDR processing, you might want to:
- Adjust Saturation: HDR can affect color intensity
- Add Contrast: Bring back some punch if needed
- Sharpen: Enhance details revealed by HDR
- Temperature/Tint: Fine-tune white balance
Step 9: Download and Save
- Review one last time
- Click Download
- Choose format (JPG for sharing, PNG for archiving)
- Save your masterpiece!
Best Practices and Professional Examples
Learn from these real-world HDR scenarios:
Example 1: Sunset Landscape
Challenge: Bright orange sky, dark silhouetted foreground
HDR Settings:
- Exposure: +0.7 EV (brighten foreground)
- White Point: 35 (preserve sunset colors)
- Intensity: 75 (reveal foreground detail)
Results:
- Before: Silhouette with no foreground detail
- After: Visible foreground detail while maintaining dramatic sunset
Example 2: Real Estate Interior
Challenge: Bright windows blow out, interior is dark
HDR Settings:
- Exposure: +0.5 EV (brighten room)
- White Point: 45 (balance window view)
- Intensity: 65 (show both indoor and outdoor)
Results:
- Before: Either dark room or blown windows
- After: Well-lit interior with visible outdoor view

Example 3: Mountain Landscape
Challenge: Bright snow peaks, dark valley
HDR Settings:
- Exposure: +0.3 EV (slight brightening)
- White Point: 40 (preserve snow detail)
- Intensity: 70 (reveal valley detail)
Results:
- Before: Lost detail in snow or valley
- After: Full range visible, natural appearance
Example 4: Urban Architecture
Challenge: Bright sky, dark building shadows
HDR Settings:
- Exposure: +0.6 EV (brighten shadows)
- White Point: 50 (balanced)
- Intensity: 80 (dramatic urban look)
Results:
- Before: Flat or extreme contrast
- After: Architectural details visible throughout
Common HDR Mistakes to Avoid
Learn from these frequent errors:
❌ Mistake 1: Too Much Intensity
Problem: Cranking intensity to 100 for every photo
Signs:
- Halos around all edges
- Flat, lifeless appearance
- Overly saturated colors
- "Crunchy" texture
Solution: Start at 50-60, increase only if needed. Most scenes look best at 60-75.
❌ Mistake 2: Gray Shadows
Problem: Making shadows too bright, losing depth
Signs:
- No true blacks in image
- Flat, washed-out appearance
- Lost sense of dimension
- Muddy shadow areas
Solution: Let some shadows remain dark. Black is OK!
❌ Mistake 3: Excessive Halos
Problem: Bright/dark glows around high-contrast edges
Signs:
- Visible light or dark outlines around objects
- Unnatural edge transitions
- "Cartoon" appearance
Solution: Lower intensity, use more subtle adjustments
❌ Mistake 4: Over-Saturated Colors
Problem: Colors become too vivid and unrealistic
Signs:
- Neon-like sky blues
- Overly vibrant greens
- Unnatural color intensity
Solution: After HDR processing, reduce saturation 10-20% if needed
❌ Mistake 5: Using HDR When Not Needed
Problem: Applying HDR to already well-exposed photos
Signs:
- No improvement in detail
- Introduction of artifacts
- Degraded image quality
Solution: Only use HDR when you actually have a dynamic range problem
Frequently Asked Questions
Q1: What's the difference between single-shot HDR and multi-shot HDR?
A:
- Multi-shot HDR: Takes 3+ photos at different exposures, merges them. Best quality, requires tripod, won't work with moving subjects.
- Single-shot HDR (our tool): Processes one photo, revealing detail from a single RAW or high-quality JPG. More convenient, works with any photo, slightly less dynamic range recovery.
Q2: Can I process JPG photos with HDR, or do I need RAW?
A: You can absolutely process JPGs! RAW files have more latitude for recovery, but JPGs work well, especially modern high-quality JPGs from good cameras or smartphones.
Q3: Will HDR make my photos look fake?
A: Only if overdone! Use subtle settings (intensity 40-60, moderate white point) for natural results. Save dramatic settings (intensity 80+) for intentionally artistic images.
Q4: How is this different from just adjusting exposure and shadows?
A: Regular shadow/highlight sliders adjust uniformly across tonal ranges. HDR processing uses tone mapping algorithms that apply different adjustments to different brightness levels, preserving more detail and avoiding clipping.
Q5: Can I use HDR for portraits?
A: Generally not recommended for close-up portraits (unnatural skin texture). However, environmental portraits (person in landscape) can benefit from subtle HDR to balance subject and background.
Q6: My HDR image looks flat. How do I fix it?
A:
- Lower the intensity (you've gone too far)
- Increase white point for more contrast
- Add a bit of regular contrast adjustment after HDR
- Let some shadows remain black
Q7: What's the best HDR intensity for landscapes?
A: Most natural landscapes look best at intensity 60-75. Dramatic landscapes can go to 80-85. Urban/architecture can handle 75-90 for stylized looks.
Q8: Should I process for HDR before or after other edits?
A: HDR first, then other adjustments. Workflow: HDR → White Balance → Exposure/Contrast → Color → Sharpening.
Conclusion
HDR processing is a powerful tool that can transform high-contrast scenes from problematic to spectacular. The key is understanding when to use it and how to apply it with restraint.
Remember the essentials:
- ✅ Use HDR for high-contrast scenes with important detail in both highlights and shadows
- ✅ Start with moderate settings and adjust carefully
- ✅ Avoid over-processing (less is more)
- ✅ Let some blacks remain black for depth
- ✅ Check for halos and artifacts
- ✅ Aim for natural-looking results unless going for artistic effect
Ready to unlock the full dynamic range of your photos?
🎨 Start HDR Processing Now — Free! →
Related Articles
- How to Fix White Balance in Photos: The Ultimate Guide
- Photo Denoise: Remove Grain and Noise from Your Images
- Sharpen Photos: Professional Image Sharpening Techniques
- Real Estate Photography: Complete Editing Guide

Tools You'll Need
- Free HDR Processing Tool - Professional HDR processing with real-time preview
- Batch Photo Editor - Process multiple HDR photos at once
- RAW Converter - Convert RAW files for maximum HDR latitude

Last updated: January 15, 2025
Related Tags
Click tags to explore more related articles
Explore More Articles
View more articles in "tutorials" category
Alex Johnson
Content Creation Team
Ready to Get Started?
Try our free online image editing tool now and start creating amazing images.
Try Free Tool →

